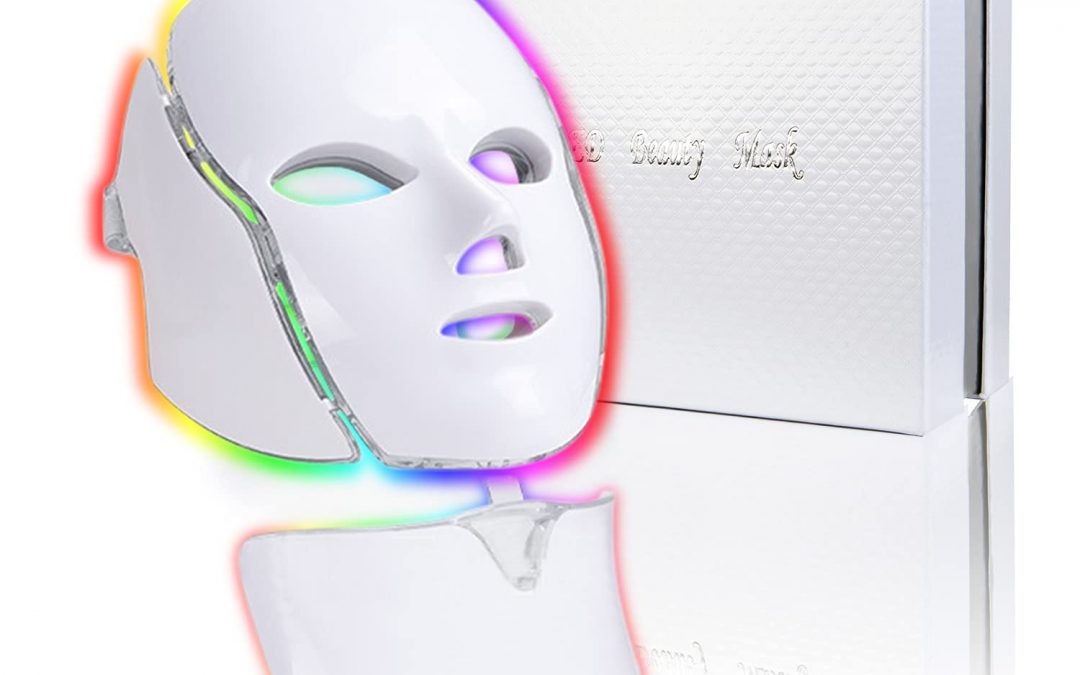
okay so let’s have a look look in the box, see what we have. we have the mask, as you can see on the inside of the mask is the led lights obviously. we have the neck piece, leds inside, usb、 cable, we have a control box, and we have a power adapter with a plug on it. obviously this would plug in here, and your two usb cables will plug in there, we’ll have a little look about oh that works soon. they have a strap that goes around your head, found me out, these i’m not sure what to call these. but we have eight of them, and they fit into these holes here, and this is to give i believe a little bit distance from your face and the leds. we’ll see how that works in the next part.
So in that first part, i said that these were spaces, that is incorrect. these actually produce an electrical current to the skin on your face. and they claim that they tighten the skin or in the chin and the cheeks、 side of the eyes and the Forehead.
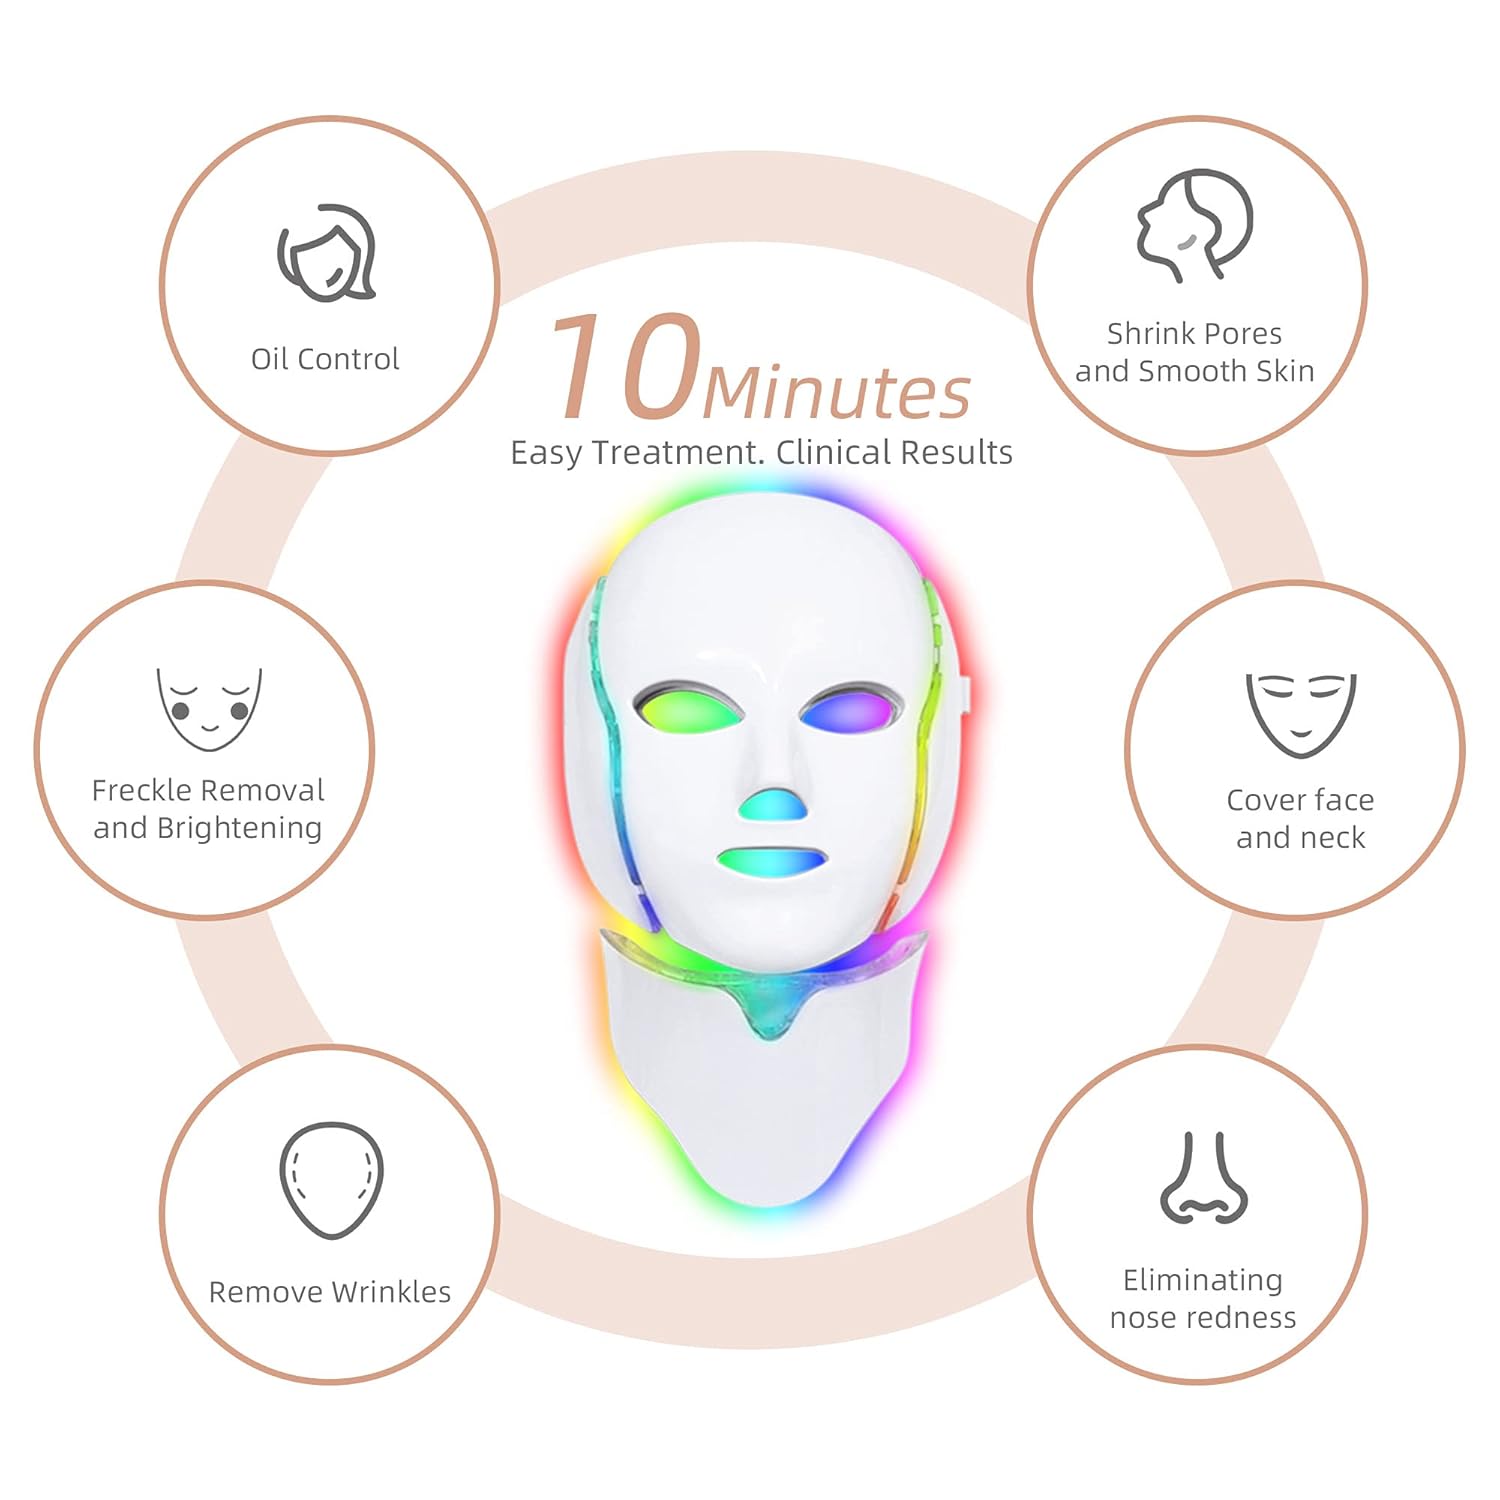
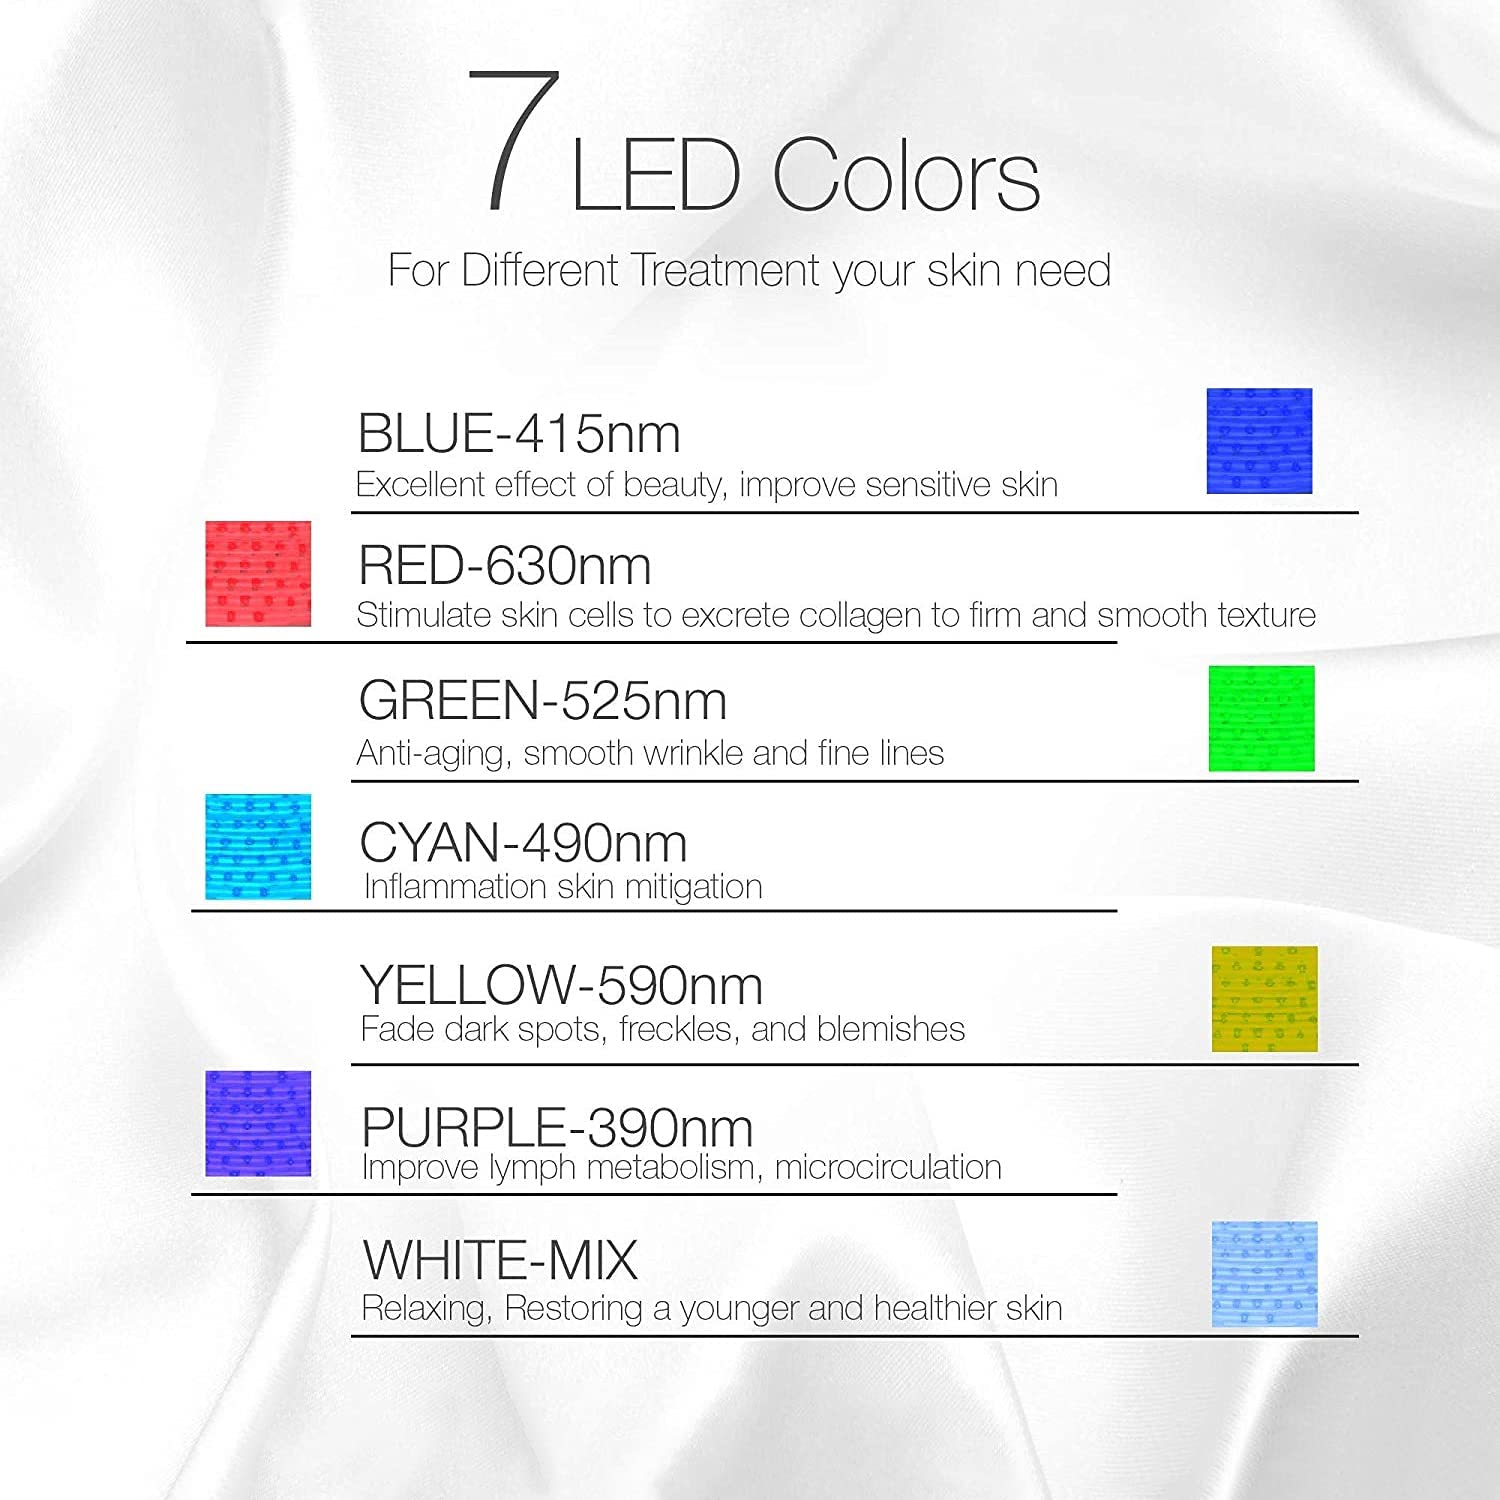
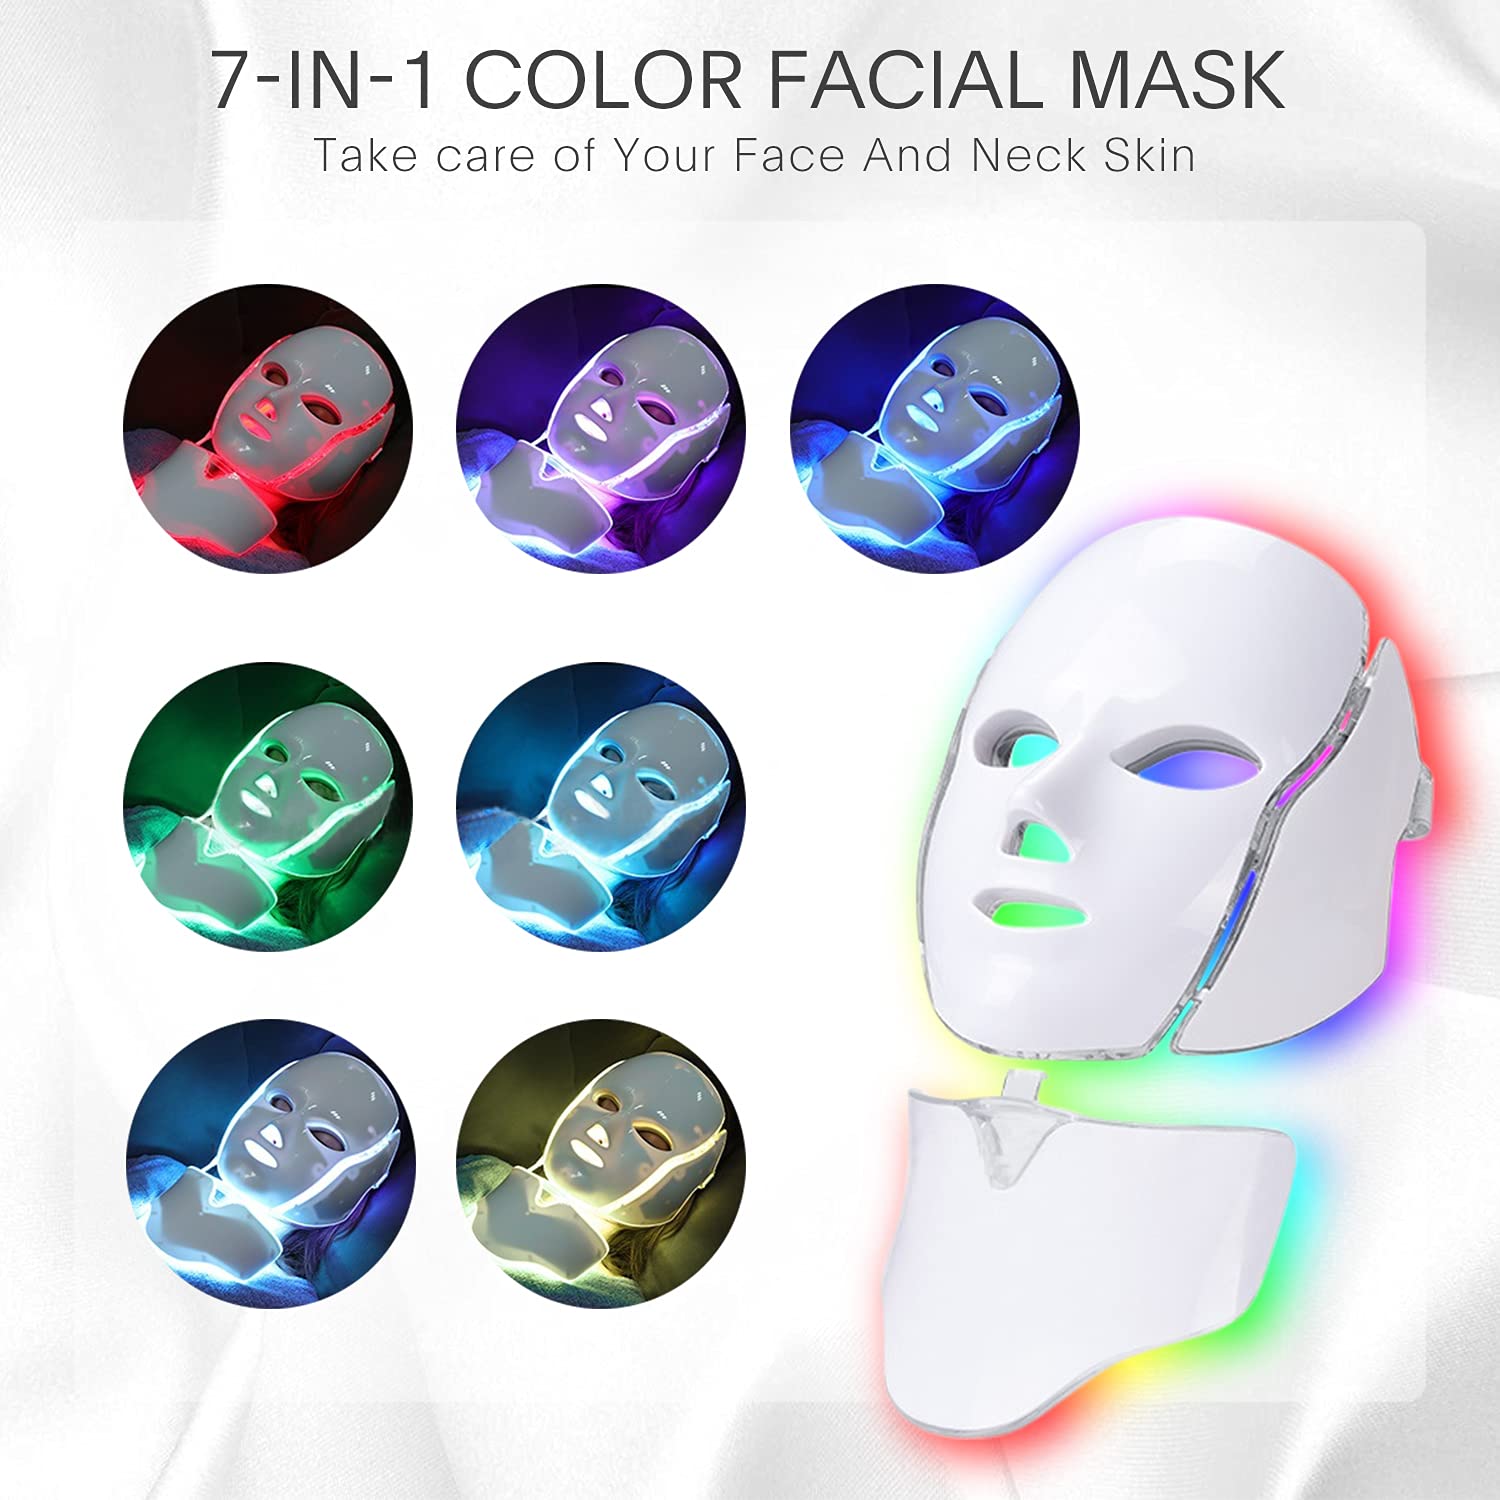
So we’re just going to go through the colors and explain a little bit about them, and then i’ll go over the control panel with you, so if we start with red helps with whitening of the skin. and then we have green, this helps with reducing oil secretion. and then we have blue ,this helps with skin firming. and then we have yellow, this helps lighten the melanin. and then we have cyan, this helps promote metabolism. and then we have purple which helps remove acne scars. and Acne like that. and then we have white, which helps remove freckles. and then next we have the multi-colored option, where it basically goes through all the colours. each for whatever time you’ve set.

So this is the control box, and when you plug it in and turn it on, you’ll be met with this number on the screen. this is 30 minutes, it represents the time, you’ll be setting for yourself. you can change this time by using these downward and upward arrows, so going with arrow for less time upward, for more time now. it’s not recommended that you do it for more than 30 minutes like three times a week, these two buttons here, these help you set the strength of the current that passes through these, if we just press the up button you can see it goes up to 69, and the lowest setting is 60. now i’m not sure this number represents.
so i’ll have to lock that up and put it on screen somewhere for you.
It’s probably volts maybe one to nine volts, now we have a color selector /star button. that’s this and as you can see it’s the red if you want to make that a stronger red, we hit this brightness button here, i just keep going through, i think it’s stronger and stronger until it goes back to normal. we have a flicker option, where basically the light pulse hits and you have three different settings for that, so if you press it again, it’ll pulse to different rate and then Again.
And then again to go back to normal, now you can change the colors like i said, as i said earlier each one has a different function click. again and again and again again once we get to. actually i’ll just turn it off, so you keep going once you get to red again. the next press turns it off ,what was trying to show you was this function, i’ve already showed you actually earlier on. it changes to all the different colors, so that’s basically it really, there’s not a lot else on here, this will count down to zero, and then that’ll go off by itself. so if you fall asleep, you know that you’re safe in the knowledge. that it will turn itself off, so yeah like i said my fiancee, really does think this has made a difference on his skin, in smoothing it out and you know tightening the skin.
Discover more from Minxu
Subscribe to get the latest posts sent to your email.